Whether you're a DIY enthusiast or a professional mechanic, replacing parts on your vehicle can seem overwhelming. But with the right information and a few tools, it doesn't have to be. In this tutorial, we'll provide step-by-step instructions to help you easily and safely replace parts on your Union City Movers vehicle. From engine components to suspension parts, we'll cover all the basics and provide tips to ensure you get the job done quickly and correctly. Replacing parts is an important part of auto repair and maintenance for Union City Movers. It requires careful consideration of safety, the right tools, and the right techniques. Whether you're a DIY enthusiast or a professional mechanic, replacing parts on your vehicle can seem overwhelming. But with the right information and a few tools, it doesn't have to be. In this tutorial, we'll provide step-by-step instructions to help you easily and safely replace parts on your Union City Movers vehicle. From engine components to suspension parts, we'll cover all the basics and provide tips to ensure you get the job done quickly and correctly. Replacing parts is an important part of auto repair and maintenance for Union City Movers. It requires careful consideration of safety, the right tools, and the right techniques.
This tutorial will provide all the information you need to replace parts correctly. When replacing parts, it's important to identify the correct part for a particular job. Different types of vehicles or components may require special considerations. Once the part is identified, it's time to gather the necessary tools and supplies.
Using the right fasteners is essential for a successful job. Different types of fasteners are available, and each one has its own purpose. It's important to understand which type of fastener should be used for a particular job and how to use it correctly.
Common Replacement Tasks
: Common replacement tasks include replacing spark plugs, oil filters, brake pads, air filters, and belts.For each task, there are specific steps that must be followed in order to complete the job properly. For example, when replacing spark plugs, it's important to check the gap of the spark plug before installation and adjust it if necessary. The spark plug should be installed correctly in order to ensure proper functioning. It's also important to follow the manufacturer's instructions for installation. When replacing oil filters, it's important to use the correct type of oil filter for the vehicle.
If the wrong type is used, it can lead to engine damage. The oil filter should be installed according to the manufacturer's instructions. Brake pads should be replaced when they become worn down or otherwise damaged. It's important to use the correct type of brake pads for the vehicle and install them according to the manufacturer's instructions. Air filters should be replaced when they become clogged or dirty. The correct type of air filter should be used and installed according to the manufacturer's instructions. Belts should be replaced when they become worn out or otherwise damaged.
It's important to use the correct type of belt for a particular vehicle and install it according to the manufacturer's instructions. Additional Steps: Depending on the job, there may be additional steps that need to be taken after a component has been replaced. For example, when replacing brakes or other hydraulic components, it may be necessary to bleed the brakes or check for leaks. When replacing electrical components, it may be necessary to test them after installation in order to ensure they are functioning correctly. It's also important to check that all connections are secure and that all bolts are tightened correctly. In some cases, new gaskets or seals may need to be applied in order to ensure a proper seal. Replacing parts correctly is essential for a successful job.
This tutorial has provided all the information you need to replace parts correctly, including important considerations such as safety, tools, and techniques as well as examples of common replacement tasks and how to identify the correct part for a particular job.
Replacing Parts
Replacing parts is an essential part of auto repair and maintenance. To ensure a successful job, it is important to understand the best practices for replacing parts. This tutorial will provide all the information you need to replace parts correctly. The first step in replacing parts is to disassemble the components. To remove components, it is important to use the proper tools and take care not to damage them.Once the components have been removed, the new parts can be installed. When installing new parts, it is important to make sure to properly torque all fasteners. By following these steps, you can be sure that you are replacing parts correctly and safely.
Tools & Techniques
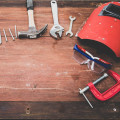
When it comes to replacing parts, having the right tools is essential for a successful job. Depending on the part you're replacing, different tools may be necessary. For example, when replacing a spark plug, you'll need a spark plug socket and ratchet.For replacing an alternator, a wrench set or ratchet and socket set will be necessary. Some parts may require soldering or crimping wires, so having the right tools for those tasks will be important. When using tools, it's important to use them correctly. For example, when using a ratchet and socket set, make sure you use the correct size socket. If it's too big or too small, it can damage the part or fastener you're trying to remove or install.
Similarly, when soldering wires together, make sure to use the correct flux and solder and heat the wires for the right amount of time. In some cases, special techniques may be necessary when replacing parts. For example, when replacing a starter motor, you may need to use a special tool to hold the flywheel in place while you install the new starter. Crimping wires together may also require special tools and techniques to make sure that the wires are securely connected.
Safety Considerations
Replacing parts in a vehicle is not a task to take lightly.Taking the proper safety precautions is essential for a successful job and for your own safety. Here are some important tips to follow before you start replacing any parts. Lifting and Supporting the Vehicle: When lifting the vehicle off the ground, make sure you use the correct equipment and follow the manufacturer's instructions. When using a jack, always use jack stands to keep the vehicle secure while you work. Never rely on a jack alone to support the vehicle. Safety Equipment: It is important to wear the right safety equipment for the job.
This includes eye protection, gloves, and protective clothing, as well as any other safety gear recommended by the manufacturer or required by law. It's also important to wear non-slip shoes and use a step ladder when needed. Handling Hazardous Materials: When working with hazardous materials and fluids, such as gasoline or engine oil, make sure you take extra precautions. Always wear protective gear, keep flammable materials away from open flames, and follow all safety instructions provided by the manufacturer. Conclusion: Replacing parts in a vehicle can be a tricky job, but if done correctly and safely, it can be an enjoyable and rewarding experience. It is important to take all necessary safety precautions and follow the manufacturer's instructions when replacing parts. Replacing parts is a crucial part of auto repair and maintenance.
It is important to use quality parts and tools, and to follow safety precautions. The tutorial provided an overview of the safety considerations, tools and techniques, and step-by-step instructions for replacing parts correctly. By following these guidelines, you can ensure that your parts replacement job is successful and that future problems are prevented.